


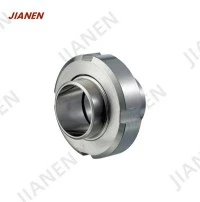


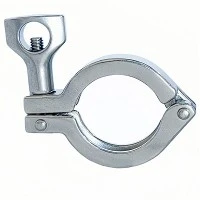
A broken sanitary pipe fitting can disrupt the normal functioning of your plumbing system and potentially lead to water damage and other issues. As a trusted Sanitary Pipe Fittings supplier, I understand the importance of being able to replace these fittings effectively. In this blog post, I'll guide you through the process of replacing a broken sanitary pipe fitting, step by step.
Step 1: Identify the Problem
The first step in replacing a broken sanitary pipe fitting is to accurately identify the problem. Inspect the pipe fitting carefully to determine the extent of the damage. Look for cracks, leaks, or signs of corrosion. It's also important to note the type of fitting that is broken, as different fittings may require different replacement procedures. Common types of sanitary pipe fittings include Stainless Steel Pipe Connectors, 90 degree elbow steel, and Ss Hose Fittings.
Step 2: Gather the Necessary Tools and Materials
Once you've identified the problem, gather the tools and materials you'll need for the replacement. Here's a list of some common tools and materials:
- Pipe wrench or adjustable wrench
- Pipe cutter or hacksaw
- New pipe fitting (make sure it matches the size and type of the old fitting)
- Teflon tape or pipe joint compound
- Safety goggles and gloves
Step 3: Shut Off the Water Supply
Before you begin any work on the pipe fitting, it's crucial to shut off the water supply to the affected area. This will prevent water from flowing while you're making the replacement and minimize the risk of flooding. Locate the main water shut-off valve for your home or the specific shut-off valve for the affected plumbing fixture. Turn the valve clockwise to shut off the water.
Step 4: Drain the Water
After shutting off the water supply, open the faucets or fixtures connected to the affected pipe to drain any remaining water from the pipes. This will help prevent water from spilling when you remove the old fitting. You may also want to place a bucket or towel beneath the fitting to catch any drips.
Step 5: Remove the Old Pipe Fitting
Use a pipe wrench or adjustable wrench to loosen and remove the old pipe fitting. If the fitting is stuck, you may need to apply some penetrating oil and let it sit for a few minutes to loosen the threads. Once the fitting is loose, carefully remove it from the pipes.


Step 6: Prepare the New Pipe Fitting
Before installing the new pipe fitting, clean the ends of the pipes where the fitting will be attached. Remove any dirt, debris, or old sealant. Apply a thin layer of Teflon tape or pipe joint compound to the male threads of the new fitting. This will create a watertight seal and prevent leaks.
Step 7: Install the New Pipe Fitting
Carefully insert the new pipe fitting into the pipes and hand-tighten it. Use a pipe wrench or adjustable wrench to give the fitting a final quarter-turn to ensure a secure connection. Be careful not to over-tighten the fitting, as this can damage the pipes or the fitting itself.
Step 8: Turn On the Water Supply
Once the new pipe fitting is installed, turn on the water supply by opening the main water shut-off valve or the specific shut-off valve for the affected plumbing fixture. Check for any leaks around the new fitting. If you notice any leaks, tighten the fitting slightly or apply more Teflon tape or pipe joint compound.
Step 9: Test the System
After turning on the water supply, test the plumbing system by opening the faucets or fixtures connected to the newly replaced pipe fitting. Check for proper water flow and make sure there are no leaks. If everything is working properly, you've successfully replaced the broken sanitary pipe fitting.
Tips and Precautions
- Always wear safety goggles and gloves when working with plumbing fixtures to protect yourself from injuries.
- If you're unsure about any step of the replacement process, it's best to consult a professional plumber.
- Make sure to use the correct size and type of pipe fitting for your plumbing system. Using the wrong fitting can lead to leaks and other problems.
- When using a pipe cutter or hacksaw, make sure to cut the pipes straight to ensure a proper fit.
- If you're replacing a fitting in a hard-to-reach area, you may need to use specialized tools or techniques.
Why Choose Our Sanitary Pipe Fittings
As a leading Sanitary Pipe Fittings supplier, we offer a wide range of high-quality products to meet your plumbing needs. Our fittings are made from durable materials such as stainless steel, which ensures long-lasting performance and resistance to corrosion. We also provide excellent customer service and technical support to help you choose the right fitting for your application.
If you're in the market for sanitary pipe fittings, we invite you to contact us for more information. Our team of experts is ready to assist you with your purchase and answer any questions you may have. Whether you're a homeowner, a contractor, or a business owner, we can provide you with the products and solutions you need to keep your plumbing system running smoothly.
Conclusion
Replacing a broken sanitary pipe fitting may seem like a daunting task, but with the right tools, materials, and knowledge, it can be a relatively straightforward process. By following the steps outlined in this blog post, you can replace a broken fitting and restore the functionality of your plumbing system. Remember to always take safety precautions and consult a professional if you're unsure about any step of the process. And if you're in need of high-quality sanitary pipe fittings, don't hesitate to contact us. We're here to help you find the perfect solution for your plumbing needs.
References
- "Plumbing Handbook" by John Doe
- "Home Improvement Guide" by Jane Smith