


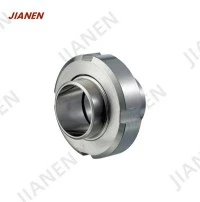


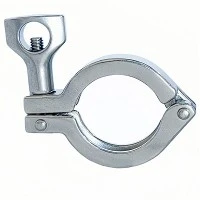
Hey there! As a supplier of Sanitary Clamped Seals, I often get asked about how to replace a worn-out one. It's a pretty common issue, especially in industries where hygiene and leak prevention are super important, like food and beverage, pharmaceuticals, and cosmetics. So, I thought I'd put together this blog post to walk you through the process step by step.
Why Replace a Worn-Out Sanitary Clamped Seal?
First off, let's talk about why it's so crucial to replace a worn-out seal. A damaged or worn seal can lead to all sorts of problems. For starters, it can cause leaks, which not only waste product but can also create a mess and potentially contaminate the surrounding area. In industries where cleanliness is key, this is a big no-no.
Secondly, a bad seal can compromise the integrity of the entire system. It might allow air or other contaminants to enter, which can affect the quality of the product being processed. And if you're in a regulated industry, that can lead to some serious compliance issues. So, it's definitely worth taking the time to replace a worn seal as soon as you notice a problem.
Tools and Materials You'll Need
Before you start the replacement process, you'll need to gather a few tools and materials. Here's what you'll typically need:
- A new Sanitary Clamped Seal: Make sure it's the right size and material for your application. We offer a wide range of seals to suit different needs, so if you're not sure which one to choose, just give us a shout.
- A wrench or a clamp removal tool: This will help you loosen and remove the existing clamp.
- A clean cloth or paper towel: You'll use this to clean the mating surfaces before installing the new seal.
- A food-grade lubricant (optional): This can make it easier to install the new seal and ensure a good seal.
Step 1: Shut Down the System
Safety first! Before you start working on replacing the seal, you need to shut down the system. This means turning off any pumps, valves, or other equipment that might be operating. You also need to relieve any pressure in the system. This is really important to prevent any accidents or injuries.
Step 2: Remove the Clamp
Once the system is shut down and depressurized, it's time to remove the clamp. Use your wrench or clamp removal tool to loosen the clamp. Depending on the type of clamp you have, this might involve turning a nut or using a quick-release mechanism. Once the clamp is loose, you should be able to slide it off.
Step 3: Remove the Old Seal
With the clamp removed, you can now access the old seal. Carefully pull the old seal out of the groove. Be gentle so you don't damage the mating surfaces. If the seal is stuck, you can use a flathead screwdriver or a similar tool to carefully pry it loose. Just be careful not to scratch the surfaces.
Step 4: Clean the Mating Surfaces
After removing the old seal, you need to clean the mating surfaces. Use your clean cloth or paper towel to wipe away any dirt, debris, or old sealant. You can also use a mild detergent if necessary, but make sure to rinse it thoroughly and dry the surfaces completely. A clean surface is essential for a good seal.
Step 5: Inspect the Mating Surfaces
While you're cleaning the surfaces, take a close look at them. Check for any signs of damage, such as scratches, nicks, or corrosion. If you notice any damage, you might need to repair or replace the mating parts before installing the new seal. Otherwise, the new seal might not seat properly and could lead to leaks.
Step 6: Install the New Seal
Now it's time to install the new seal. If you're using a food-grade lubricant, apply a thin layer to the seal and the mating surfaces. This will make it easier to slide the seal into place. Carefully place the new seal in the groove, making sure it's seated properly. Make sure the seal is centered and there are no wrinkles or folds.
Step 7: Reattach the Clamp
Once the new seal is in place, it's time to reattach the clamp. Slide the clamp back over the mating parts and tighten it using your wrench or clamp removal tool. Make sure the clamp is tightened evenly to ensure a good seal. Don't over-tighten the clamp, though, as this can damage the seal or the mating parts.
Step 8: Test the System
After you've installed the new seal and reattached the clamp, it's time to test the system. Turn the system back on and check for any leaks. You might need to let the system run for a few minutes to make sure everything is working properly. If you notice any leaks, you might need to double-check the installation and make any necessary adjustments.


Tips and Tricks
Here are a few tips and tricks to make the replacement process go more smoothly:
- Keep the new seal in a clean, dry place until you're ready to install it. This will prevent it from getting dirty or damaged.
- If you're having trouble installing the seal, try using a seal installation tool. This can make it easier to get the seal into the groove without damaging it.
- Make sure to follow the manufacturer's instructions for the new seal. Different seals might have different installation requirements, so it's important to read the instructions carefully.
Related Products
If you're in the market for other related products, we've got you covered. We offer a wide range of Stainless Steel Pipe Fitting, including sanitary bend ferrule fittings. These fittings are designed to provide a secure and leak-free connection in sanitary applications.
We also have Crimp Ferrule & Sleeve For Rubber Hose. These are great for creating a strong and reliable connection between a rubber hose and a pipe or fitting.
And if you need a pipe coupling stainless steel, we've got that too. Our stainless steel couplings are durable and resistant to corrosion, making them ideal for sanitary applications.
Conclusion
Replacing a worn-out Sanitary Clamped Seal might seem like a daunting task, but it's actually pretty straightforward if you follow the steps outlined above. By taking the time to replace a worn seal, you can prevent leaks, maintain the integrity of your system, and ensure the quality of your product.
If you have any questions or need help choosing the right seal or other products for your application, don't hesitate to contact us. We're here to help you find the best solutions for your needs. Whether you're a small business or a large corporation, we can provide you with high-quality products and excellent customer service. So, if you're in the market for Sanitary Clamped Seals or related products, give us a call or send us an email. We look forward to working with you!
References
- Industry standards and guidelines for sanitary equipment maintenance.
- Manufacturer's instructions for Sanitary Clamped Seals and related products.